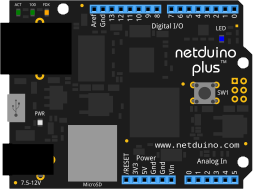
Access your Netduino from the Web
Make your Netduino accessible from anywhere via the Yaler relay.
Prerequisites
Setting up your device requires a relay domain. Please sign up to get one.
Setting up the hardware
Cuno Pfister's Gsiot.Server library runs on Netduino Plus, Netduino Plus 2, Mountaineer and other .NET Micro Framework boards.
Follow these steps on your Windows computer to make sure that the Netduino's DHCP is on and a MAC address is set.
- Start MFDeploy.exe located in
C:\Program Files (x86)\Microsoft .NET Micro Framework\v4.x\Tools\MFDeploy.exe
- Select Device type
USB - Plug in your Netduino via USB
- Click the Ping button until the Netduino replies with
Pinging... TinyCLR
- To open the network configuration dialog, select the menu
Target > Configuration > Network
- Make sure the DHCP Enable checkbox is checked
- Make sure the MAC address is the same as the address printed on the sticker on your Netduino
- Click Update to save changes to the Netduino
- Reboot the Netduino by unplugging and replugging its USB cable
- Done.
Installing the Gsiot.Server library
Follow these steps to add Cuno Pfister's Gsiot.Server library to Visual Studio.
- For Netduino Plus, download
Projects+V20110526... .zip
For Netduino Plus 2 or Mountaineer boards, downloadGsiot+samples+for+NETMF+4.2... .zip
- On Windows, open the ZIP and copy the folders Gsiot.Server and HelloWeb (and, if available, Oberon.Netmf.Compatibility) to
C:\Users\USER_NAME\Documents\Visual Studio 2012\Projects
- Done.
Running a Web service example
- On Windows in Visual Studio, open the project
HelloWeb
- Replace <insert your relay domain here> with your relay domain, e.g. for the relay domain gsiot-ffmq-ttd5 that would be
RelayDomain = "gsiot-ffmq-ttd5",
- Replace <insert your secret key here> with your key, e.g. for the key o5fIIZS5tpD2A4Zp87CoKNUsSpIEJZrV5rNjpg89 that'd be
RelaySecretKey = "o5fIIZS5tpD2A4Zp87CoKNUsSpIEJZrV5rNjpg89",
- Right below, add this line to set your relay host
RelayHost = "try.yaler.io",
- Build and upload the example code to your Netduino
- Done. Now, see how to access your device from a Web browser or with Curl (add
/helloto make it work).
Learning more
For an excellent introduction and more examples, read the book Getting Started with the Internet of Things by Cuno Pfister.
 This work by Yaler GmbH is licensed under a Creative Commons Attribution-ShareAlike 4.0 International License.